New: Determination of chromatic aberration (english)
1. Intro
This HOWTO describes how to determine correction values for lens distortion for specific lenses, which will allow easy correction of distortion using the PanoTools by Helmut Dersch. To obtain these correction values we will be using Joost Nieuwenhuijse's PTGui frontend to the PanoTools.Helmut Dersch introduced the straight line control points in March 2002, which makes it very simple to determine and correct lens distortion in digital images. You only have to mark as many points as desired on a line which should have been straight (but isn't due to the distortion), and the optimizer then calculates the correction values to render the line(s) straight in the resulting picture.
For this to work, it is sufficient to have one straight line in the picture, though straight structures which extend from the center to the edges will result in a better correction.
Thanks to Joost Nieuwenhuijse's implementation of this feature in his PTGui, determination of such correction parameters has become very easy (even for non-experts).
1.1. Prerequisites
For starters, you should have some experience in digital image processing in general, and with PTGui in particular. Sufficiently capable hardware obviously is also required. All PTGui versions starting with 1.05 beta 3 support straight line control points. Download PTGui from http://ptgui.com/.PTGui optimizer doesn't know straight line control points, hence a recent version of the PanoTools (-> Download) should be installed and PTGui must be configured accordingly (Tools, Options, Panorma Tools). All local versions of pano12.dll must be replaced with this version (rename old pano12.dll, don't delete)
2. Preparation
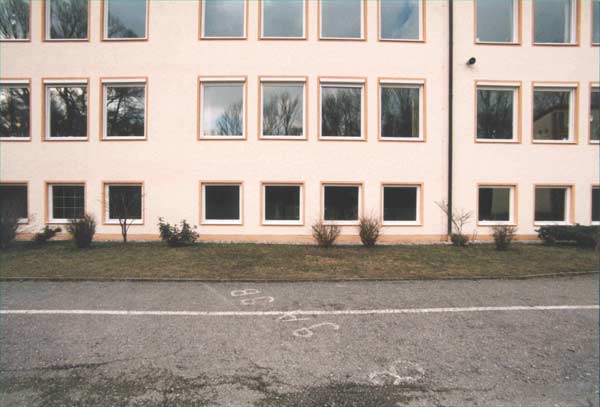
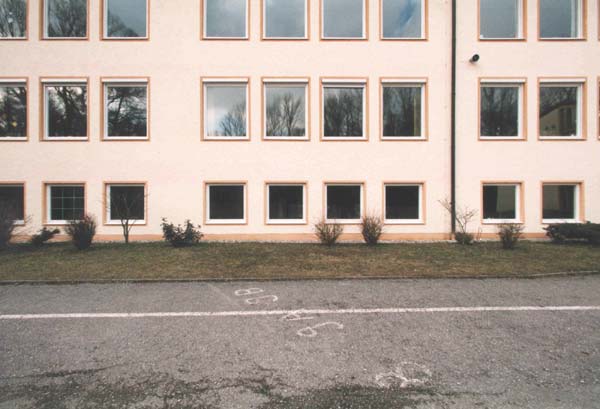
You need a picture with straight structures from the center to the corners to use the "Straight Line" control points. You could take a photo of a piece of grid paper shot at short distance. For long distance you can shoot a building with grid-like windows. Lens distortion is different for short and long distance shots.The pictures must be perfectly focused and should be photographed with mirror lock up and/or remote release from a tripod. It can be heavily sharpened for even better results.
For demonstration purposes, I have used a picture taken by Manfred Ritter
using a Canon EF 17-35mm lens at 17mm. (For the complete picture click
on the thumbnail). Many thanks to Manfred Ritter for making the picture
available for use in this document.:
3. Procedure
Load the picture into PTGui.On the "Lens settings" tab you must enter the focal length or
the Hor. Field of View. With digital cameras you can use the EXIF-Data to determine the original focal length.
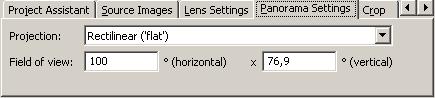
In the "Panorama settings" tab you should chose Projection Rectilinear
and for
Field of View a value slightly larger than the field of view of the lens as entered in "Lens settings" This can be adjusted in the panorama editor (Ctrl+E), too.
The "Crop" and "Image parameters" tabs are left to defaults.
Now you can set control points. You should mark as many points as possible on an (in reality) straight line near the long edge of the picture. Make sure to use the same line number for all points of the line. If you have wavy distortion you should place several lines between the edges and middle. It is even possible to mark vertical and/or diagonal lines.
PTGui can not place control points in only one window. For this reason you have to place the points alternating in the left and right window.
You can either add points to an existing line or start a new line by setting the CP-type drop-box accordingly: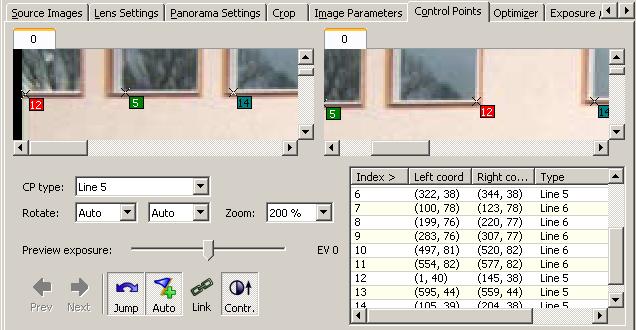
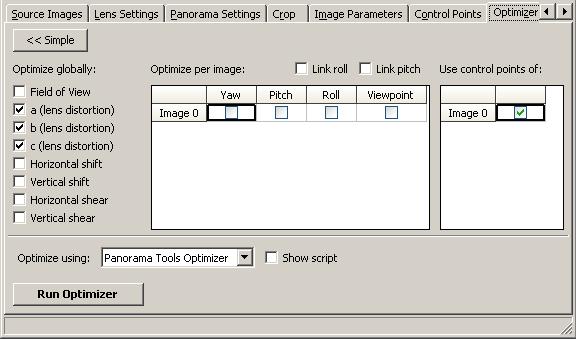
On the "Optimizer" tab, choose the Advanced Interface, and check Lens
parameters a, b and c. Neither
Field of View, shear nor the positional parameters Yaw, Roll and Pitch can be optimized in our case. Choose Optimize using: Panorama Tools Optimizer. Start the Optimizer by clicking Run Optimizer.
Some iterations later, an "Optimizer Results" box will be shown, which should show a fairly good :optimizer result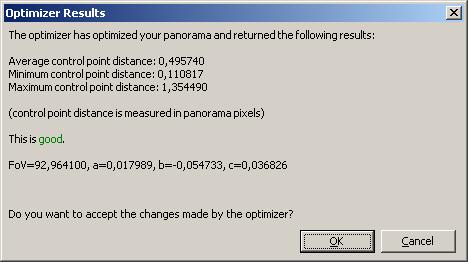
Once you click Ok the values for a, b and c are copied to the "Lens Settings" page, where you can add them to the Lens Database for future use (in the dialog insert name to activate save to Database)
Choose Preview to get a first impression of the correction. If your image viewer (configured under "Tools, Options") supports drawing of straight lines you can easily test the result.
If there is still some distortion left in parts of the image select additional lines in the distorted area in the "Control Points" tab, and simply run the optimizer again. As soon as your result is good enough you can calculate the resulting image on "Create Panorama".
You can crop the result in the panorama editor (Ctrl+E). On "Create Panorama" tab check Link width and Height and under Set optimum size... choose Maximum size for output:

Here is the original picture shown above, after the calculated corrections have been applied. (click on the thumbnail for the full picture).:
The parameters where: a
e-Mail: Erik Krause
Good luck!
© Erik Krause 2002-2008